Gear Guides
How to Set Up a Trail Camera So It Actually Catches Deer
Gifting a trail camera? Here's the plain-English placement and setup guide that turns it from a fun gadget into a scouting tool the hunter will use opening week.
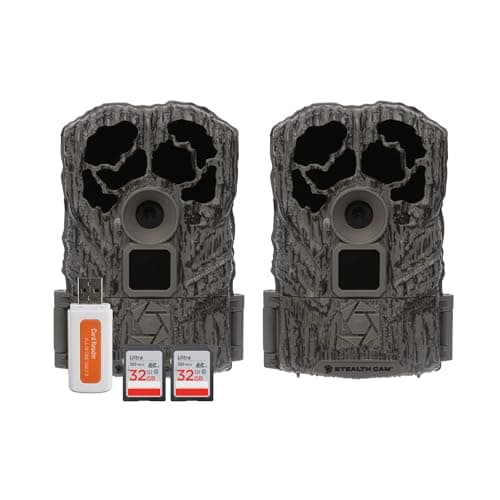
A trail camera is a wonderful gift, but here's the honest truth: a great camera in the wrong spot, aimed the wrong way, catches a whole lot of nothing. Where and how it's placed matters just as much as the camera itself. So whether you're giving one and want to tuck a helpful tip card in the box, or the hunter in your life just unwrapped one and you'd like to sound like you know what you're talking about, this is the plain-English setup guide.
None of this is complicated, and you don't need to be a hunter to understand it. We'll cover where to put the camera, how high and at what angle to mount it, the simple trick of facing it north, how to keep from spooking the very deer you're trying to watch, and the handful of settings that matter. Follow these and the camera goes from a fun gadget to a real scouting tool — the kind of gift they'll be using opening week.
Where to place it: trails, feeders and scrapes
A trail camera only catches deer where deer actually go, so location is everything. The best spots are the places deer naturally travel and gather. Trails— the worn paths deer use to move between where they sleep and where they eat — are a classic choice; point the camera along one and you'll catch deer coming and going. Food sources like a field edge, a feeder (where legal), or a favorite oak dropping acorns are magnets, especially in the evening. And in the fall, scrapes— patches of bare, pawed-up ground that bucks make and revisit during the rut — can be gold.
A couple of plain tips make a big difference. Where a camera watches a trail, it's smart to angle it slightly down the path rather than straight across it, so the camera has an extra beat to catch a fast-walking deer instead of just its tail. And any spot with steady deer traffic beats a random pretty tree every time — follow the sign, not the scenery. If the hunter is still choosing a camera, our how to choose a trail camera guide pairs perfectly with this one.
Mounting height and angle
The default instinct is to strap the camera to a tree at eye level, and that's usually a mistake. Most hunters mount a trail camera a bit lower — roughly waist-to-chest height on the animal, often around knee-to-waist height off the ground — because that puts a deer's body squarely in the frame instead of catching only its legs or, if it's too high, missing it entirely.
Angle matters just as much as height. The camera should be level, or tilted very slightly downtoward where the deer will be, so the animal lands in the middle of the shot. If the ground slopes, a small wedge, stick, or the camera's own adjustable mount helps aim it properly. Also clear away any stray branches, tall grass, or leaves in front of the lens: on a windy day a waving twig can trigger the camera over and over, filling the card with hundreds of useless photos (and draining the batteries). Thirty seconds of tidying up the view saves a lot of junk pictures.
Face it north to beat the sun
This is the insider trick that makes you look like a pro: whenever you can, point the camera north. Here's why. The sun rises in the east and sets in the west, so a camera facing east or west will, at some point every day, be aimed straight into a low, blinding sun. That washes photos out into a bright glare and can even fool the camera into snapping empty pictures as sunlight and shadows shift. Deer are most active at dawn and dusk — exactly when the sun is lowest and worst — so an east- or west-facing camera tends to blow the most important shots.
Aiming the camera north(or roughly so) keeps the sun out of the lens all day and gives clean, evenly lit photos morning to night. It's a tiny detail that dramatically improves the pictures, and it costs nothing but a moment of thought when you hang the camera.
Don't spook the deer you're watching
Deer live by their nose, and a wary buck that smells human intrusion will often go nocturnal or simply move somewhere else — which defeats the whole point. So the goal is to set up and check the camera while leaving as little trace as possible. Try to hang it quickly and quietly, ideally in the middle of the day when deer are bedded and away, rather than lingering at prime dawn or dusk. Many hunters wear rubber boots and gloves and keep handling to a minimum to cut down on the human scent they leave behind.
The bigger scent problem is checkingthe camera. Every trip in to pull the memory card is another dose of human presence right where the deer live. Two things help. First, don't check it too often — give it a couple of weeks between visits, and go at midday. Second, this is the real argument for a cellular camera: because it sends photos straight to a phone, the hunter almost never has to walk in at all, so the spot stays undisturbed. That undisturbed-woods benefit, not just the convenience, is why serious scouters love them — more on the trade-offs in our best trail cameras roundup.
The settings that matter
You don't need to master every menu on a trail camera — just a few settings decide whether it works well. Here's the plain version, so you can help set it up or explain it.
Make sure the date and time are set correctly first, because knowing exactly when a deer walked past is half the value of a trail camera. Choose photo mode for the longest battery life (video is fun but drains power and fills the card much faster). A short delaybetween shots — the pause before the camera can fire again — keeps a single deer standing at a feeder from producing five hundred near-identical photos. And drop in a good-sized memory card plus a fresh set of batteriesbefore hanging it, so it can run for weeks unattended. That's genuinely most of it. Set the clock, pick photo mode, add a card and batteries, and the camera does the rest.
Frequently asked questions
How high should you mount a trail camera for deer?
Lower than eye level is usually best — roughly knee-to-waist height off the ground, so a deer's body fills the frame instead of just its legs. Aim the camera level or tilted slightly down toward where the deer will be, and clear away any branches in front of the lens.
Why should a trail camera face north?
The sun rises in the east and sets in the west, so an east- or west-facing camera gets blinded by a low sun at dawn and dusk — exactly when deer are most active. Facing the camera north keeps the sun out of the lens all day for clean, evenly lit photos.
Where is the best place to put a trail camera?
Where deer actually travel and gather: along worn trails between bedding and food, at field edges or feeders where legal, and at rut-season scrapes. Follow the fresh sign rather than picking a spot by scenery, and angle the camera down a trail to catch fast-moving deer.
How do I keep a trail camera from spooking deer?
Hang it quickly and quietly, ideally at midday when deer are bedded, and minimize the human scent you leave. Most of all, don't check it too often — every card pull leaves scent. A cellular camera helps most, since photos come to a phone and the spot stays undisturbed.
What trail camera settings should I use?
Set the date and time first so you know when deer pass. Choose photo mode for the best battery life, use a short delay between shots to avoid hundreds of duplicates, and load a good-sized memory card with fresh batteries so it runs for weeks unattended.